Solar Ray Rising the Creation of an Art Installation
“Daylight streaming through the windows allows the unique textures and contours of the glass to glisten. At night the piece is ignited with an auroral display of color against a dark sky, using the latest RGB technology. Playing off our tower’s architecture, as it arches towards the sun, this installation exemplifies how the Glassworks’ designs create wonderment and discovery in public spaces.”
- Tim DeJong, Head Gaffer and Founder of Wimberley Glassworks

[The Solar Ray Art installation lit by morning sunlight.]
How is an art glass installation designed? There are stages to every installation;
- Concept
- Glass Prototyping
- Space Planning and Layouts
- Hardware and Support Systems
- Glass Production
- Installation
Concept
The Solar Ray art installation began as an idea to create a focal point at night that was just as vibrant as our yellow tower is during the day. The inspiration for the shape really took cues from the architecture of the Tower itself; the angle of the roof and the peaks of the windows
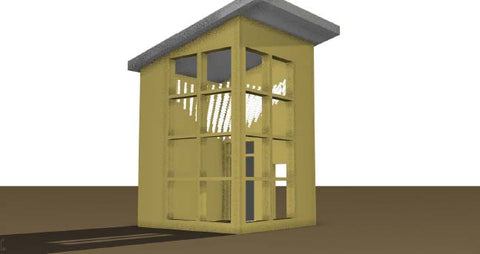
[A 3-D render of the tower with an early concept of the Solar Ray art installation.]
The general shape of the art installation itself is integrated into the process to help create a unity and balance to the design. In this case the Solar Ray installation was made to suggest a concave surface with the lights hung higher on the edges and progressively lower toward the middle.
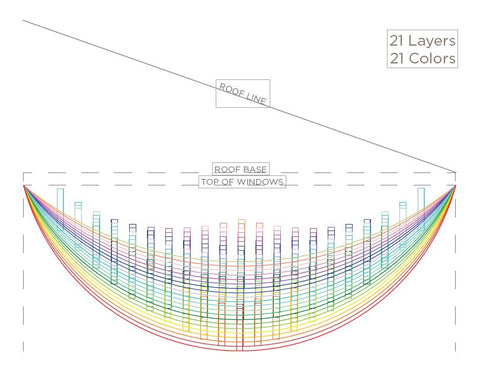
[The Solar Ray installation was initially conceived with 21 separate layers to create the ball-like concave effect.]
Glass Prototyping
Once the idea had been fully realized the practical requirements of creating the art installation becomes the primary focus. This involves an exploration of the possibilities for color, texture and shape each piece of glass to be used.
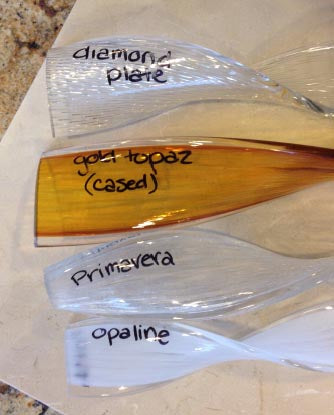
[Glass prototypes with a variety of hues, opacities, and hues. Ultimately the Primavera, Diamond Plate and Opaline patterns were chosen to make up the majority of the Solar Ray installation due to the way they refracted and diffused light.]
In this case, we went with three different textures, of different opacities. The Primavera pattern made up the majority of the display being overwhelmingly clear. This allowed the light to travel most cleanly through the glass and cast the most complete shadows on the walls. The diamond plate was slightly more opaque with the textured pattern more severely distorting the light as it passed through it. The Opaline pattern was set with a ribbon of opaque glass through its length, fully diffusing any light as it passed through the ribbon.
With the prototypes finished and finishes selected the project shifted into production.
Production
A large ball of glass was gathered on the end of a blow pipe and pressed into heavy gauge plate steel to flatten. In this process patterns could be pressed into the surface.
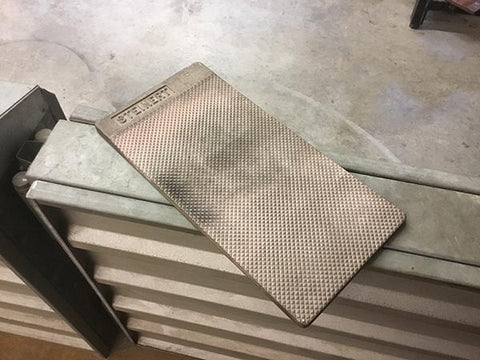
[When the diamond plate pattern is created the glass is pressed into this textured plate steel to imbue the surface of the glass with its unique criss-cross pattern. This pattern is then pulled into a diamond shape as the glass is stretched and twisted into a ribbon]
The glass ball is then raised the top of a ladder and pulled downward into a uniform strip using sheers to grip its end. While the glass is slowly stretched into a strip, a third glass blower will cool portions of its surface with compressed air to insure that all of the glass is at the same temperature. This helps create a uniform shape.
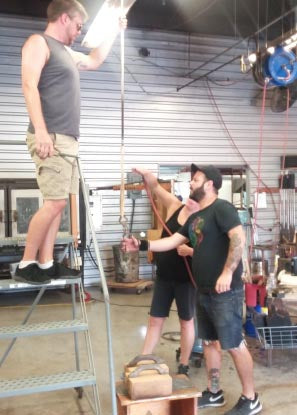
[While the glass is slowly stretched into a strip, a third glass blower will cool portions of its surface with compressed air to insure that all of the glass is at the same temperature. This helps create a uniform shape.]
While the glass is still hot, paddles made of cork are used to twist the strip into the signature ribbon of the Solar Ray installation. This ribbon is measured against a jig to make sure that the curves, twists and length are proper. If the ribbon of glass is correct it is blasted with another long jet of compressed air and cooled to lock in the shape. The glass ribbon is then put into an Annealing Kiln to slowly cool over 24 hours.
Finally, the glass is cold worked, polished, cut into the proper lengths and wired to be hung as part of the installation.
Space Planning and Layouts
Now that we know the size and shape, we can start to lay out how the installation will fit into the physical space it will be placed. Careful measurements are made of the interior dimensions of the WGW tower and wire lengths are determined. This is the final plan showing the arrangement of the three different textures along with the length of wire used to hang each piece.
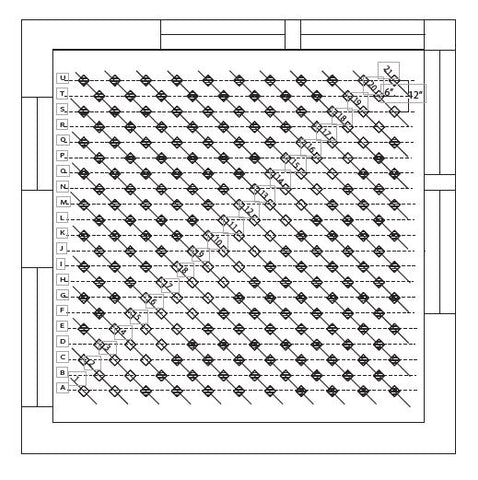
[Space plan for the Solar Ray installation. Each piece is individually measured and precisely placed for the creation of the installation.]
Renders are created and shared with the client to show how the piece might look in the space. There may be many iterations of both the plan and the render before we reach the final look.
Hardware & Support Systems
At this point, we determine what hardware we would need to achieve the desired effect, this usually includes doing mockups- In this case we did two, one to check the hardware with the glass and the movement of the pieces, and one with the rgb lighting system to see how the placement needed to be and how it would interact with the glass.
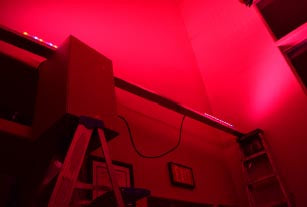
[LED lighting rig test in red. The lighting rig is capable of thousands of different color combinations.]
Installation
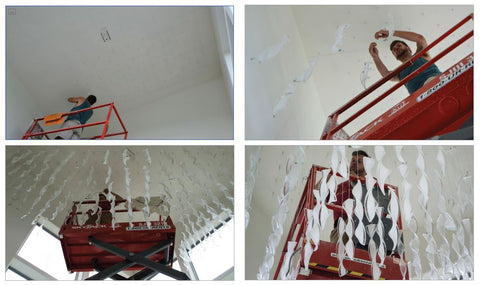
[The Solar Ray art installation as it is being hung, one wired ribbon of glass at a time]
The installation process involved the wiring and hanging of 221 individual pieces of glass over a period of only two days. A pair of LED lighting rigs were installed into overhangs on the south and west walls, projecting slowly shifting fields of color onto the Solar Ray installation. While the lighting effects are visible during the day the most dramatic time to view the installation is at night.
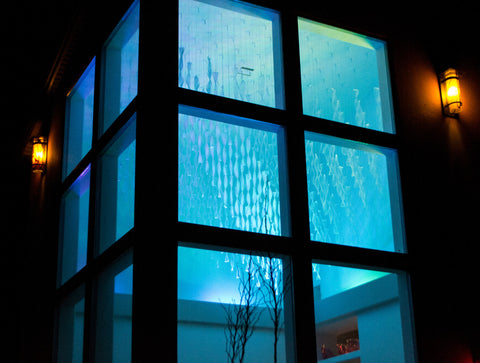
[The Solar Ray installation as viewed after dark.]
The fields of color refract beautifully through the Primavera and Diamond plate ribbons of glass, casting shadows and lighting patterns on the walls behind the display. The Opaline glass with its frosted provides a wonderful diffusing effect.
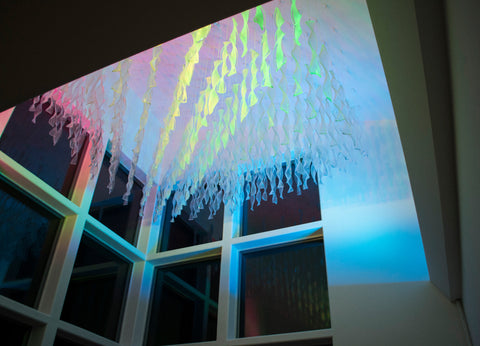
[The patterns of color projected onto the Solar Ray installation create wonderful lighting effects throughout the Wimberley Glass Works tower atrium.]
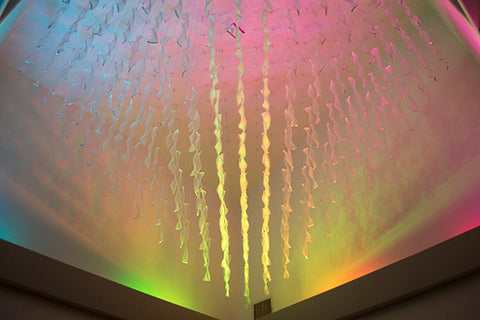
[The shifting fields of color drift from blue to red to green as they are cast upon the ribbons of glass.]

[During the day the LED lighting is far less apparent while the sun’s rays refracted through the glass predominate.]
Come by the Wimberley Glassworks gallery and take a look for yourself!
Leave a comment